HelioTrak Sundial Download and
Assembly
Download, 3-D Print, and
Assemble a Solar Tracking Sundial
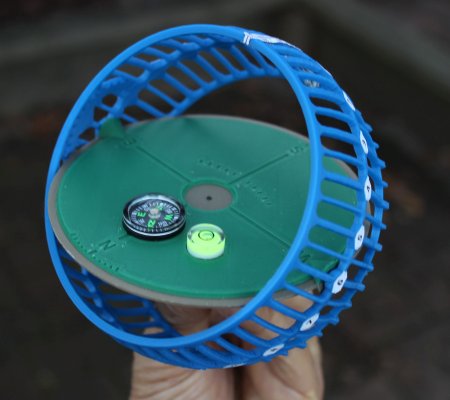
The HelioTrak
sundial is a mechanical model showing the Sun's path
through the sky during the day. To get a sundial, download
the data files, 3D-print the parts, and assemble them.
Note: The sundial design is free to use for personal or educational purposes.
Sundial Parts
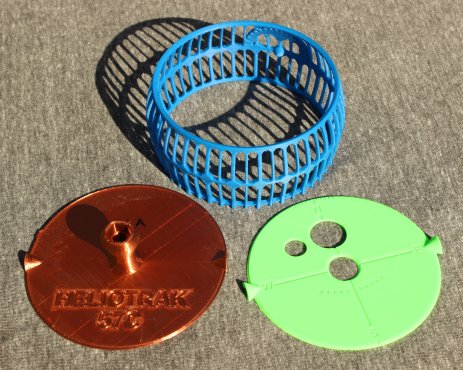
The HelioTrak sundial requires at least the following 3-D
printed parts:- Download Solar track cage (1,409 K)
- Download Base bottom (183 K)
- Download Base top (117 K)
The following parts are optional:
- Magnetic compass (to orient the sundial to north)
- Bubble level (to make sure the base is level)
- Analemma sticker (to adjust for exact solar position)
- Standard 1/4" 20 thread hex nut (for mounting the sundial on a tripod)
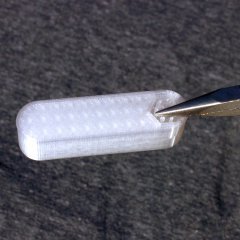
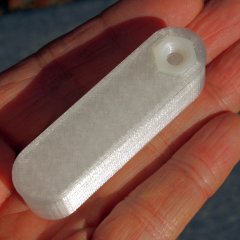
- 3D-printed handle extender (for easier tripod mounting):
download Handle Extender (28K)
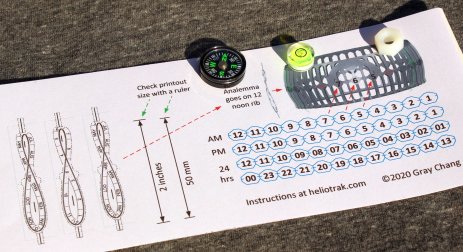
Magnetic compasses and bubble levels are available from Amazon and Ebay. Search for "magnetic compass 20 mm" and "bubble level 12 mm".
Hex nuts are available at hardware stores and online; search for "1/4-20 hex nuts". Get plain hex nuts without flanges or locks, preferably made of nylon.
The analemma stickers are free to print out:
Print at 100% full size on self-adhesive paper if available. Otherwise, print on plain paper and glue the shapes onto the sundial.
3-D Printing
The 3-D printing files in STL (stereo lithography) format are
available here. - heliocage57c.stl file (1,409 K)
- heliobasebottom57c.stl file (183 K)
- heliobasetop57c.stl file
(117 K)
- helioextenderc.stl file (Optional) (28K)
You can print the parts using any colors. I chose blue for the cage (sky), brown for the base bottom (soil) and green for the base top (grass).
If you don't have access to a 3-D printer, you have them printed by a service, either locally or by mail. I've ordered parts from Treatstock and Craftcloud. If you want to get your parts made there, follow the instructions after the Parts Assembly section below.
I tried four different lower-cost 3-D printing services. For the base parts, I got the best results from Hudson Creative Group (accessible through CraftCloud), and for the cage, I got the best results from crK Technologies (accessible through Treatstock). I paid a total of $120 for parts from both providers to make 12 sundials.
Hudson produced the smoothest flat surfaces and I liked the colors (the bright green and copper-color base parts). crK Technologies produced the most accurate and smoothest cage parts, without any rough inside seam between the top and bottom halves of the cage. I think the rough seams in cages made elsewhere were caused by warping or shrinkage of the lower half during printing.
Parts Assembly
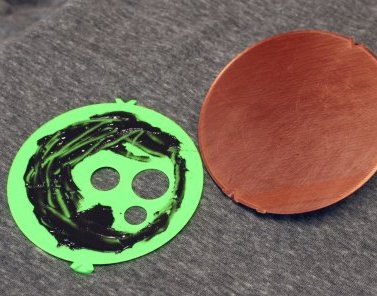
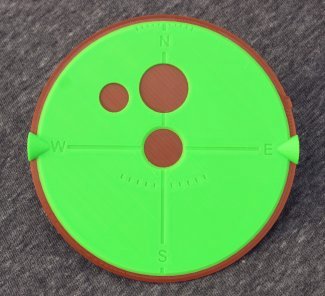
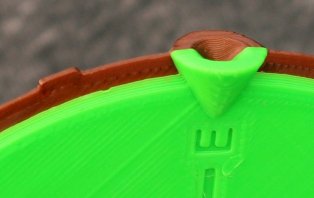
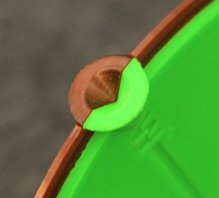
To assemble the sundial:- Using epoxy glue or other suitable adhesive, glue
together the top and bottom base pieces, with the east "E"
compass point of the top piece near to the tiny tab of the
bottom piece. Align the pieces as precisely as you can at
the cone hinge receptacles.
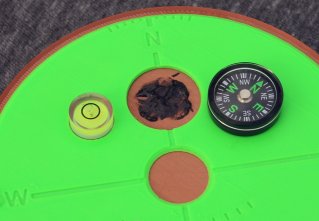
- Glue on the bubble level and magnetic compass. Make
sure the bottom of each device is seated against the flat
surface of the lower base piece.
- Using a Sharpie or similar marker pen, mark a small dot
in the center of the base.
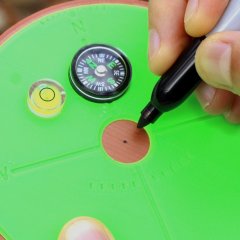
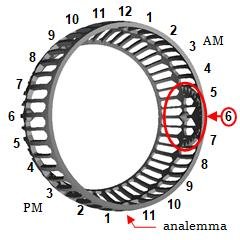
- Cut apart the 24 hour-stickers from the analemma printout sheet
and apply them to the hour pads of the cage. You can
choose either AM/PM hours (1-12 and 1-12) or 24-hour time
(00-23). The 6 AM (06) hour is at the angle dial and cone
hinge, and the 6 PM (18) hour is at the opposite hinge.
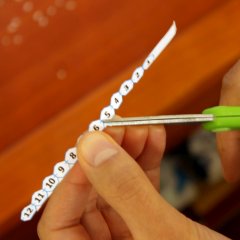
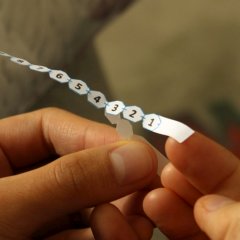
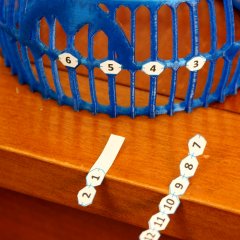
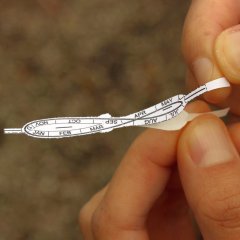
- Cut out an analemma
sticker and apply it to the 12 noon rib. The tabs on
the ends should line up with the rib, which places the figure-8
very slightly tilted and off-center. This is the precise
location of the analemma relative to the solar track.
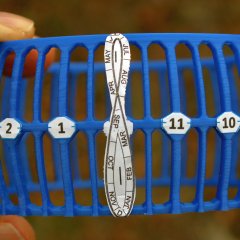
- Push the base into the cage.
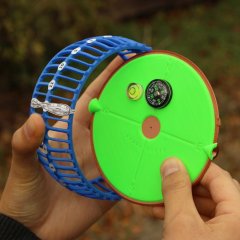
- Set the two cone hinges of the cage inside the two cone
receptacles of the base, with the east "E" side of the
base at the 6 AM pad and angle dial.
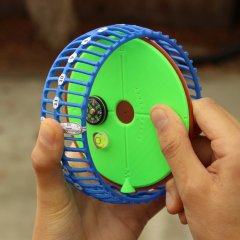
The sundial is now ready to use, as described in the HelioTrak Sundial main page.
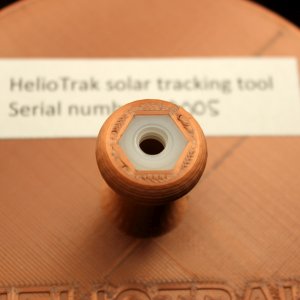
If you want to mount the sundial on a tripod, put a hex nut inside the handle.
Alternatively, you can use the optional 3D-printed handle extender, which allows tripod mounting without blocking the cage at low latitudes.
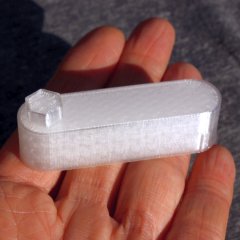
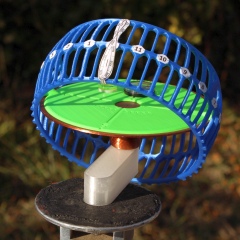
A newly printed extender has some temporary supports inside the hex nut receptacle. Break and remove the supports, then insert a hex nut.
How to Order 3-D
Printing From Treatstock
- Go to treatstock.com and click "Order 3D Print".
- Click "Upload Files ...".
- Select your STL files to be printed (the three files you downloaded from the top of this web page). After selection, verify that the unit of measurement is set to MM.
- Change the quantity (if more than 1), then click "Next
>".
- Select the material (I used PLA) and colors. Click on
each piece to specify its color. Your color choices affect
the quoted prices.
- Choose the service provider and click "Buy".
- Fill out your name and other details, and pay for the
service.
How to Order 3-D Printing From CraftCloud
- Go to Craftcloud3d.com and click "Get Instant Quote".
- Click "Upload Your Files".
- Select your STL files to be printed (the three files you
downloaded from the top of this web page).
- Confirm your location and measurement units, Millimeters
(mm)
- Change the quantity (if more than 1), then click "See
Materials and Prices".
- If you want to print each part in a different color,
uncheck all STL files except for the first one.
- Choose the material (I chose PLA) and click Continue.
Note: The price includes shipping the first piece. The prices for the next pieces should be lower, as they will be shipped with the first one.
- Select the finish (I chose Standard) and click Continue.
- Select the color and click Continue.
- Click "Add to Cart".
- Repeat Steps 5 through 10 for the remaining pieces.
- Click "Continue to Checkout" and pay for the service.
